
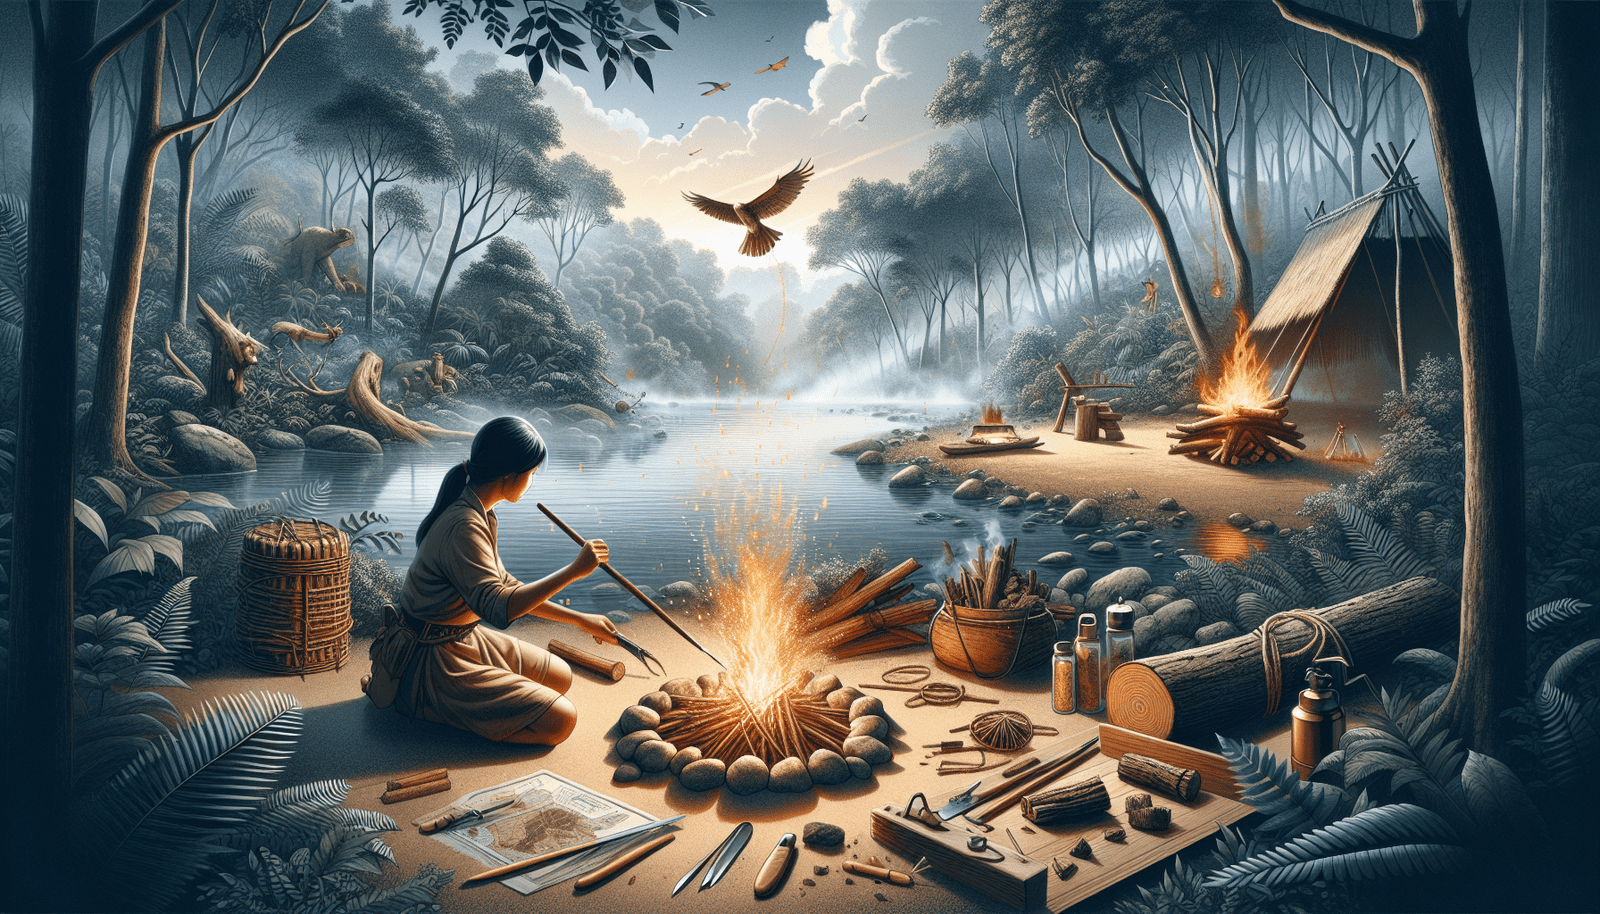
Are you an adventurous spirit, always seeking new thrills in the great outdoors? Or perhaps you’re someone who values preparedness and wants to be ready for anything life throws at you. Either way, one thing is certain: wilderness survival skills are a must. Whether it’s building a fire to keep warm, finding food and water, or simply staying safe in the wild, having these skills can mean the difference between a challenging experience and a life-threatening situation. That’s why I created “The Survivalist Handbook,” a blog dedicated to equipping you with the knowledge and techniques you need to thrive in any wilderness environment. In my “Wilderness Survival” category, you’ll find a treasure trove of articles covering everything from essential skills to specific threats and scenarios. Get ready to become a master in the wilds with our latest article on essential techniques for fire building in wilderness survival.
1. Importance of Fire Building in Wilderness Survival
1.1 Significance of fire for survival
When it comes to wilderness survival, fire building is one of the most essential skills you can learn. Fire plays a crucial role in keeping you warm, providing a source of light, cooking food, boiling water, and even signaling for help. In a survival situation, fire can be the difference between life and death.
Not only does fire provide practical benefits, but it also serves important psychological purposes. Fire can offer a sense of comfort and security, helping to alleviate fear and anxiety. It can also provide a morale boost, giving you a sense of accomplishment and control in a challenging environment. Therefore, understanding the significance of fire in survival is absolutely crucial.
1.2 Benefits of fire in a wilderness environment
In a wilderness environment, fire offers several benefits that can greatly enhance your chances of survival. Firstly, and most importantly, fire provides warmth. When temperatures drop, especially during the night, having a fire can prevent hypothermia and keep your body functioning optimally.
Secondly, fire acts as a source of light, allowing you to see in the dark and navigate your surroundings. This is particularly useful when setting up camp, gathering resources, or moving around during nighttime.
Additionally, fire can be used for cooking and purifying water. By creating a flame, you can heat food and water, making it safe to consume. This is crucial for maintaining your energy levels and hydration in a survival situation.
Lastly, fire can act as a signaling method to attract rescuers. Smoke signals, especially during the day, can be seen from a distance and serve as a beacon for help. By understanding the importance of fire building in wilderness survival, you can harness its benefits to increase your chances of rescue.
2. Basic Fire Building Principles
2.1 Understanding the fire triangle
Before you can successfully build a fire, it’s important to understand the basic principles that govern fire. The fire triangle consists of three components: fuel, heat, and oxygen. Without any of these elements, a fire cannot start or sustain itself.
Fuel refers to any combustible material that can be burned, such as dry leaves, twigs, or wood. Heat is the ignition source that initiates the burning process, which can come from a spark, friction, or a flame. Oxygen is necessary for the combustion process to occur and sustain the fire.
By understanding the fire triangle, you can assess your resources and ensure you have enough fuel, a proper ignition source, and adequate airflow to create and maintain a fire.
2.2 Selecting the right location for your fire
Choosing the right location for your fire is crucial for safety and efficiency. Look for a spot that is sheltered from wind and provides a natural windbreak, such as a rock formation or dense vegetation. This will help prevent your fire from being extinguished or spreading out of control.
Avoid building a fire under overhanging branches or near flammable materials, as this increases the risk of accidents or wildfires. Clear the area of any dry leaves, grass, or debris that could potentially catch fire and ensure there is enough space for you to move around safely.
Furthermore, consider the surroundings and the potential impact of your fire on the environment. Avoid building fires in ecologically sensitive areas and be mindful of the local regulations and restrictions regarding fire building.
2.3 Gathering tinder, kindling, and fuel
Once you have chosen a suitable location, it’s time to gather the necessary materials for your fire. Start by collecting tinder, which is highly flammable material that ignites easily. This can include dry grass, leaves, bark, or even char cloth. Ensure your tinder is as dry as possible, as damp or wet tinder will be difficult to ignite.
Next, gather kindling, which consists of small sticks or twigs that will act as the initial fuel for your fire. Look for dry, dead branches or twigs that are no thicker than your thumb. Gradually increase the size of the kindling as your fire grows stronger.
Lastly, collect fuel, which includes larger pieces of wood that will serve as the long-lasting fuel for your fire. Look for dry, seasoned wood that is preferably no larger than your forearm. This will ensure that the wood burns efficiently and produces a steady flame.
2.4 Building and arranging the fire lay
Building the fire lay refers to the arrangement of fuel and kindling in a strategic manner to maximize the chances of ignition and sustainable burning. The most common fire lay arrangement is the tepee style, where the kindling is arranged in a cone shape with the tinder at the center. This allows for maximum airflow and efficient burning.
Alternatively, you can use the log cabin style, where kindling is placed in a crisscross pattern, forming a square or rectangular structure. This arrangement provides stability and allows for air circulation.
Regardless of the type of fire lay you choose, ensure that there is enough space between the fuel for proper airflow and that the tinder is tightly packed in the center to catch fire easily. Gradually add kindling and fuel as the fire grows stronger, allowing for a sustained flame.
By following these basic fire building principles, you can successfully create a fire in the wilderness and ensure your survival needs are met.

3. Essential Fire Starting Techniques
3.1 Using primitive methods (friction-based)
In a wilderness survival scenario, it’s important to have a repertoire of fire starting techniques in case you find yourself without modern tools. Primitive fire starting methods involve using friction to create heat and ignite a fire.
One common method is the hand drill, where a wooden spindle is rotated against a wooden base or hearth. This friction generates heat, creating an ember that can be transferred to the tinder bundle and blown into flame.
Another method is the bow drill, which involves using a bow to rotate the drill against the base. This technique allows for greater efficiency and control, as the bow provides a consistent and steady rotation.
Both of these methods require practice and patience, as well as the right materials, such as dry and durable wood. While primitive fire starting techniques may be challenging, they are valuable skills to learn and can come in handy in emergency situations.
3.2 Utilizing modern fire starting tools (matches, lighters, etc.)
In addition to primitive methods, modern fire starting tools can greatly simplify the fire building process. Items such as matches, lighters, and fire starting rods are lightweight, portable, and reliable sources of ignition.
Matches, particularly waterproof matches, are a convenient and easy-to-use option. Ensure you have a sufficient supply and keep them in a waterproof container to protect them from moisture.
Lighters, such as butane lighters, provide instant flame and are a reliable choice for fire starting. They are compact, long-lasting, and can easily fit in your pocket or survival kit.
Fire starting rods, also known as ferrocerium rods or firesteel, produce hot sparks when struck with a metal object. They are durable, weather-resistant, and can be used in various weather conditions, making them an excellent backup option.
Having modern fire starting tools in your survival kit ensures that you have a reliable and efficient method of starting a fire, regardless of your environment or situation.
3.3 Creating and using fire starting aids
In addition to the fire starting techniques themselves, using fire starting aids can greatly increase your chances of successfully igniting a fire. Fire starting aids are materials that are easily combustible and can be used to assist in the fire building process.
One popular fire starting aid is the char cloth, which is made by charring a piece of natural fabric, such as cotton or linen. Char cloth easily catches fire from sparks, making it an excellent tinder material.
Cotton balls soaked in petroleum jelly are another effective fire starting aid. The petroleum jelly acts as a fuel, prolonging the burning time of the cotton ball and increasing its chances of catching fire.
Other fire starting aids include dryer lint, wax-coated paper, or even commercially available fire starters. These aids are lightweight, easy to carry, and can greatly increase your success rate when starting a fire in challenging conditions.
By incorporating fire starting aids into your fire building techniques, you can enhance your chances of quickly and efficiently igniting a fire, even under adverse circumstances.
4. Wet Weather Fire Building
4.1 Tips for finding dry materials in wet conditions
Building a fire in wet conditions can be challenging, as moisture makes it difficult to find suitable tinder, kindling, and fuel. However, with the right techniques and resourcefulness, it’s still possible to start a fire.
Start by looking for materials that are naturally sheltered from the elements, such as under rocks, fallen trees, or within the core of standing trees. These areas often provide pockets of dry materials that can be used for fire building.
Bark from standing trees, especially birch or cedar, can be peeled off to reveal dry inner layers that can serve as tinder or kindling. Splitting damp logs with an axe or knife can expose dry wood on the inside, which can be used as fuel.
Additionally, look for dead branches or twigs that are hanging off trees, as they are less likely to be in contact with wet ground. These branches may still contain dry wood that can be used as kindling.
Remember to always check the moisture content of your materials and ensure they are as dry as possible before using them in your fire lay.
4.2 Techniques for building a fire in damp surroundings
When building a fire in damp surroundings, it’s important to take extra precautions to ensure your fire has the best chance of success. Start by creating a base for your fire lay using rocks or a platform made from logs or branches. This will raise your fire off the wet ground, allowing for better airflow and insulation.
Use dry tinder and kindling to give your fire a head start. If your available tinder and kindling are damp, place them near your body or inside your clothing to warm them up and dry them out. Alternatively, use fire starting aids, such as char cloth or cotton balls soaked in petroleum jelly, which are more resistant to moisture.
Once your initial flame has started, gradually add dry kindling and fuel to build up your fire. Keep the fire small and close to the ground to prevent rain or wind from extinguishing it. Shield your fire from direct exposure to the elements by constructing a makeshift shelter using logs or a tarp.
4.3 Creating a waterproof fire pit
In wet weather conditions, it’s important to protect your fire from rain or snow to ensure it stays lit. One way to achieve this is by creating a waterproof fire pit.
To create a waterproof fire pit, start by digging a small pit in the ground, ensuring it is below the surface and surrounded by a raised mound or a ring of rocks. This will prevent water from seeping into the fire pit.
Line the bottom of the pit with several layers of rocks, which will act as a heat reflector and prevent water from pooling. Place a layer of dry, non-combustible material, such as small pebbles or sand, on top of the rocks to further insulate the fire from moisture.
Build your fire on top of the non-combustible layer, taking care to keep it compact and close to the ground. This will help protect it from rain or snow and provide better control over the fire.
By creating a waterproof fire pit, you can ensure that your fire remains lit even in wet weather conditions, enhancing your survival capabilities.

5. Fire Safety in the Wilderness
5.1 Fire safety protocols to prevent wildfires
When building and maintaining a fire in the wilderness, it’s crucial to follow fire safety protocols to prevent the risk of wildfires. Here are some important guidelines to keep in mind:
- Check local regulations and restrictions regarding fire building. Some areas may have specific rules, permits, or fire bans in place, especially during dry seasons or in high-risk fire zones.
- Always choose a safe location for your fire, away from flammable materials, overhanging branches, or dry vegetation.
- Clear the area around your fire from dry leaves, grass, or debris that could easily catch fire.
- Never leave your fire unattended. Always ensure someone is present to monitor and tend to the fire at all times.
- Keep a safe distance from your fire to prevent accidental burns or clothing catching fire.
- Have a reliable source of water nearby, such as a bucket or water bottle, to extinguish the fire quickly if necessary.
- Ensure your fire is completely extinguished before leaving the area or going to sleep. Drown the fire with water, stir the ashes, and repeat the process until there are no hot embers remaining.
By adhering to these fire safety protocols, you can minimize the risk of wildfires and ensure the safety of yourself, others, and the surrounding environment.
5.2 Proper extinguishing and disposal of fire
Extinguishing a fire properly is crucial to prevent any chances of it reigniting or spreading. Here is the recommended process for extinguishing and disposing of a fire:
- Begin by reducing the size of your fire by gradually adding smaller pieces of wood or reducing the airflow. This will help to minimize the flames and heat.
- Once the fire has reduced in size, use a water source to drown the fire. Start by pouring water onto the embers and the base of the fire, ensuring that all the fuel is thoroughly soaked.
- Stir the fire with a stick or shovel to ensure that all the embers are thoroughly wetted and no hot spots remain. Continue to add water and stir until you are confident that the fire is completely extinguished.
- Use the back of your hand to test the area for any remaining heat. If it feels warm, continue to add water and stir until the heat is fully dissipated.
- After the fire is completely extinguished, carefully dispose of the wet ashes and leftover debris in a designated fire pit or a non-combustible container.
- Finally, ensure that the surrounding area is clean and free of any trash or leftover materials. Leave no trace behind and respect the wilderness environment.
By following this proper extinguishing and disposal process, you can prevent any accidental wildfires and leave the wilderness as you found it.
5.3 Controlling fire for cooking and warmth
While fire safety is a top priority in the wilderness, it’s also important to understand how to control fire for cooking and warmth. Here are some tips for safely utilizing fire for these purposes:
- Establish a designated cooking area away from the main fire, using a separate fire pit or stove. This helps to prevent accidental burns from sparks or hot embers.
- Ensure you have a stable cooking surface, such as rocks or a metal grate, to support your cookware and utensils.
- Use long-handled utensils to keep a safe distance from the flames and to prevent accidental burns.
- Prioritize safety when handling hot cookware or boiling water. Use heat-resistant gloves or utensils to protect yourself and avoid splashes or spills.
- Keep a safe distance between yourself and the fire when seeking warmth. Avoid sitting too close to the flames, as this can lead to burns and clothing catching fire.
- Never leave a fire unattended when using it for cooking or warmth. Ensure someone is present to monitor the fire at all times.
By understanding how to control fire safely for cooking and warmth, you can enjoy the practical benefits of fire while minimizing any risks.
6. Advanced Fire Building Techniques
6.1 Creating long-lasting fires for overnight survival
In some survival situations, you may need a fire that can last throughout the night to keep you warm and provide a sense of security. Here are some advanced fire building techniques to create long-lasting fires:
- Start with a solid base of rocks or a platform made from logs to raise your fire off the ground and prevent soil or water from affecting its longevity.
- Use larger, dense pieces of wood as your fuel. Hardwoods, such as oak or maple, burn slower and produce long-lasting coals.
- Arrange the wood in a long, parallel fashion, resembling a log cabin structure. This allows for maximum airflow and a slow, controlled burn.
- Gradually add fuel as needed, ensuring there is a steady supply of wood to maintain the fire throughout the night.
- Use a reflector wall made from large rocks or logs to direct the heat and warmth towards your shelter or sleeping area. This helps to maximize the efficiency of the fire and conserve energy.
By employing these techniques, you can create a long-lasting fire that provides continuous warmth and comfort throughout the night, enhancing your chances of survival.
6.2 Constructing reflector walls and fire shelters
In extreme wilderness survival situations, where protection from the elements is crucial, constructing reflector walls and fire shelters can greatly enhance your chances of staying warm and safe.
A reflector wall is a structure built behind the fire to reflect heat and warmth towards your shelter or sleeping area. Construct it using large rocks, logs, or even a makeshift wall made from branches and foliage. The reflector wall should ideally be slightly curved to direct the heat more effectively.
A fire shelter, on the other hand, is a structure built around the fire to provide insulation and protection. It can be made using logs, branches, and vegetation, creating a domed or tent-like structure. Ensure there is enough space inside to comfortably sit or lie down, and leave a small opening for ventilation.
Both reflector walls and fire shelters mitigate the loss of heat and help retain warmth, essential for cold or harsh conditions. However, exercise caution when constructing fire shelters, ensuring that the materials used are not easily ignitable and that the shelter is located at a safe distance from the flames.
6.3 Utilizing alternative fire building methods (e.g., Dakota fire hole)
In certain situations, alternative fire building methods can be effective and offer unique advantages. One such method is the Dakota fire hole, which is particularly suitable for windy or adverse weather conditions.
The Dakota fire hole involves digging a hole in the ground, typically around 1 to 2 feet deep. Dig a second hole about a foot away, connecting the two with a tunnel. This tunnel serves as the air intake for the fire.
The fire is built in the main hole, allowing for improved control and containment of the flames. The tunnel draws fresh air from the bottom, feeding oxygen to the fire and creating a more efficient burn.
The Dakota fire hole minimizes the risk of the fire being extinguished by wind and reduces the visibility of the flames, making it a viable option for situations where discretion is important.
By familiarizing yourself with alternative fire building methods, you can adapt to various scenarios and optimize your chances of survival in different environments.
7. Fire Starting Tools and Equipment
7.1 Recommended fire starting tools
Having the right fire starting tools in your wilderness survival kit can greatly simplify the fire building process. Here are some recommended tools to consider:
-
Waterproof matches: These are an essential fire starting tool, as they provide a reliable ignition source even in wet conditions. Be sure to store them in a waterproof container to protect them from moisture.
-
Lighter: A butane lighter is a compact and convenient fire starting tool. It produces an instant flame and is easy to use. Consider carrying multiple lighters for backup.
-
Fire starting rod: Also known as ferrocerium rods or firesteel, these rods produce hot sparks when struck with a metal object. They are durable, weather-resistant, and can be used in various weather conditions. Pack one as a reliable backup option.
-
Magnesium fire starter: These tools consist of a magnesium bar and a striker. By shaving off slivers of magnesium and igniting them with the striker, you can create hot sparks that can start a fire even in damp conditions.
-
Fire piston: A fire piston uses rapid compression of air to create heat, igniting tinder in the process. While it requires some practice to use effectively, it is a compact and lightweight option that can be useful in extreme situations.
Investing in high-quality fire starting tools ensures that you have reliable and efficient methods of starting a fire in any wilderness scenario.
7.2 Evaluating pros and cons of different fire starting equipment
As with any equipment, it’s important to evaluate the pros and cons of different fire starting tools to determine which ones are best suited for your needs. Here are some factors to consider:
-
Reliability: Consider the reliability of the tool, particularly in various weather conditions. Some tools, such as matches or lighters, may struggle in wet or windy environments, while others, like fire starting rods, are more weather-resistant.
-
Ease of use: Evaluate how easy and intuitive the tool is to use. Some tools, like lighters or matches, require minimal effort and skill, while others, such as primitive friction-based methods, require practice and technique.
-
Weight and portability: Take into account the weight and portability of the tool. Lightweight options, such as matches or fire starting rods, are more suitable for backpacking or situations where every ounce counts.
-
Shelf life: Consider the shelf life of the tool. Matches and lighters have a limited lifespan and may degrade over time, so be mindful of their expiration dates. Fire starting rods and magnesium fire starters, on the other hand, can be used indefinitely.
By carefully evaluating the pros and cons of different fire starting equipment, you can make an informed decision and select the tools that best suit your needs and circumstances.
7.3 Importance of carrying fire starting backups
In wilderness survival situations, it’s always important to carry backup fire starting tools and equipment. Murphy’s Law dictates that if something can go wrong, it will, and having reliable backups ensures that you have multiple options for starting a fire.
Carrying multiple sets of waterproof matches or lighters gives you redundancy in case one set fails or gets lost. Additionally, having a fire starting rod or a magnesium fire starter as a backup provides an alternative ignition source that is reliable and weather-resistant.
Always consider the conditions you may encounter and pack your fire starting backups accordingly. It’s better to have multiple tools at your disposal than to be left without a means of starting a fire in a survival situation.
8. Fire Building Techniques for Different Environments
8.1 Fire building in snowy or icy conditions
Building a fire in snowy or icy conditions presents additional challenges due to the moisture content and limited availability of suitable materials. Here are some techniques to consider:
-
Clear a space: Start by clearing away the snow down to the ground, creating a space that is free from moisture. This prevents the melting snow from extinguishing your fire.
-
Use a platform: Create a platform using logs, rocks, or even a metal surface to keep your fire off the snow. This helps to insulate the fire and prevent the heat from being absorbed.
-
Gather dry materials: Look for dry, dead branches or twigs that are hanging off trees or located above the snowline. This ensures that the materials are less likely to be in contact with moisture.
-
Use fire starters: In extremely cold conditions, fire starting aids, such as char cloth or cotton balls soaked in petroleum jelly, are essential for igniting a fire. They are more resistant to moisture and can withstand the cold temperatures.
By adapting your fire building techniques to snowy or icy conditions, you can overcome the challenges and ensure your survival in a winter environment.
8.2 Fire building in desert or arid environments
Building a fire in desert or arid environments requires a different approach, as it involves working with limited resources and the risk of wildfires. Here are some techniques to consider:
-
Create a fire bed: Clear away any flammable materials, such as dry grass or brush, from the area where you plan to build your fire. Dig a shallow pit to serve as a fire bed and lining it with rocks for containment.
-
Collect scarce fuel: Look for dead and dry plant material, such as twigs or cactus spines, which can be used as fuel. Alternatively, use dried animal dung as a readily available source of fuel.
-
Utilize windbreaks: Desert environments are often windy, so scouting for natural windbreaks, such as large rocks or sand dunes, will help protect your fire and prevent it from spreading.
-
Extinguish and clean up completely: After your fire is no longer needed, ensure it is fully extinguished and cool to the touch. Remove any remaining fuel or debris and disperse the ashes to leave no trace of your fire.
When building a fire in desert or arid environments, always exercise caution and consider the potential risks and impact on the fragile ecosystem.
8.3 Fire building in dense forest or wooded areas
Building a fire in dense forest or wooded areas requires extra precaution due to the risk of wildfires. Here are some techniques to follow:
-
Choose a suitable location: Avoid areas with thick undergrowth or overhanging branches. Look for clearings or natural fire rings to minimize the risk of the fire spreading.
-
Prepare a fire bed: Clear away any dry leaves, grass, or debris from the ground. Create a bed of rocks or a fire pit to contain the fire and prevent its contact with the surrounding vegetation.
-
Collect fuel from deadwood: Focus on gathering fuel from sources that are already on the forest floor, such as dry and dead branches. Avoid damaging live trees or cutting live branches.
-
Monitor the fire closely: Maintain constant vigilance over the fire, attending to it at all times. Keep water or firefighting equipment nearby to extinguish any sparks or embers that may escape.
-
Extinguish and clean up properly: Before leaving the area, ensure the fire is completely extinguished. Use water to douse the flames and stir the ashes until everything is cool to the touch. Disperse the ashes and clean up any remaining debris.
When building a fire in dense forest or wooded areas, it’s important to prioritize fire safety and take additional precautions to prevent the risk of wildfires.
9. Troubleshooting Common Fire Building Problems
9.1 Difficulty obtaining a spark or flame
If you’re having trouble obtaining a spark or flame when starting a fire, there are several potential causes and solutions to consider:
-
Insufficient friction: If using primitive methods, ensure that you are applying enough downward pressure or rotational speed to generate the required heat for ignition. Adjust your technique or gather additional energy for more effective friction.
-
Damp materials: If your materials are damp or wet, it may be difficult to obtain a spark or flame. Dry them out as much as possible by placing them near your body or using fire starting aids that are resistant to moisture.
-
Insufficient oxygen: Ensure that your fire lay or fire pit provides adequate airflow. Adjust the arrangement of your materials or clear away any obstructing debris to allow for better oxygen circulation.
-
Insufficient tinder: If your tinder material is not easily ignited, consider using fire starting aids such as char cloth or cotton balls soaked in petroleum jelly. These aids have a higher chance of catching a spark and igniting into flame.
By troubleshooting these common problems, you can overcome difficulties in obtaining a spark or flame and increase your success rate when starting a fire.
9.2 Fire extinguishing due to lack of proper airflow
If your fire is struggling to stay lit or keeps extinguishing due to lack of proper airflow, consider the following solutions:
-
Adjust your fire lay: Rearrange your fuel and adjust the spacing between the materials to allow for better airflow. Sometimes, reducing the size of the fire or adding smaller pieces of wood can help improve combustion.
-
Clear obstructions: Ensure that there are no obstructions, such as debris or wet leaves, blocking the airflow. Clear the area around your fire to prevent any restrictions to the oxygen supply.
-
Utilize reflector walls: Construct reflector walls using rocks or logs to direct the heat and airflow towards your fire. This will help to concentrate and intensify the combustion process.
-
Protect the flame: Shield your fire from strong winds or gusts by constructing a natural windbreak or using a makeshift shelter. This will prevent the flames from being extinguished or the fire from spreading.
By addressing the issue of lacking airflow, you can ensure that your fire has the necessary oxygen supply to sustain combustion and longevity.
9.3 Sustaining a fire in windy conditions
When faced with windy conditions, sustaining a fire can be challenging. Here are some techniques to help you maintain a fire in these circumstances:
-
Choose a sheltered location: Seek out natural windbreaks, such as rock formations or dense vegetation, to provide a barrier against the wind. Position your fire on the leeward side of this barrier to minimize its impact.
-
Create a fire pit or fire reflector: Construct a fire pit or surround your fire with a reflective wall to shield it from the wind. This will help contain the heat and prevent the flames from being extinguished.
-
Use smaller pieces of fuel: In windy conditions, flames can be easily swept away or weakened. Use smaller pieces of fuel that ignite quickly and produce a concentrated flame. Gradually add larger pieces as the fire stabilizes.
-
Monitor and tend to the fire: Be vigilant and attentive to your fire when it is exposed to wind. Promptly adjust the fire lay, add additional fuel, or provide additional protection to ensure the fire remains resilient.
By implementing these techniques, you can sustain a fire in windy conditions and ensure it continues to provide you with warmth and functionality.
10. Fire Building as a Survival Signal
10.1 Understanding fire’s role as a signaling method
Fire can serve as an effective survival signal, attracting attention and signaling for help in emergency situations. Understanding how fire acts as a signaling method can greatly increase your chances of being noticed and rescued.
Smoke signals, in particular, are a widely recognized form of fire-based communication. By creating a large, continuous column of smoke, you can indicate your presence to potential rescuers who may be searching for signs of distress.
10.2 Techniques for creating smoke signals
Creating effective smoke signals requires knowledge of specific techniques and materials. Here are some techniques you can utilize to create visible smoke signals:
-
Use green vegetation: Green leaves, branches, or grass produce more smoke than dried materials. Select green vegetation and place it on your fire to create thick, visible smoke.
-
Smother the fire: Reduce the airflow to your fire by covering it partially with damp materials, such as moist leaves or a piece of clothing. This will produce more smoke and less flame.
-
Create multiple short bursts: Instead of maintaining a continuous column of smoke, create short bursts of dense smoke that rise and dissipate quickly. This creates a more intermittent and eye-catching signal.
-
Choose favorable weather conditions: Select calm and windless conditions to ensure that the smoke rises vertically and remains highly visible. Wind can disperse the smoke quickly and render your signal less effective.
By incorporating these techniques into your fire building process, you can create visible smoke signals that improve your chances of attracting the attention of rescuers.
10.3 Using fire to attract rescuers
In addition to smoke signals, fire can be used to attract the attention of potential rescuers in other ways. Here are some techniques to consider:
-
Create a signal fire: Build a large, well-maintained fire that produces a strong and visible flame. This can serve as a beacon, particularly during nighttime or in remote areas. Ensure the fire is positioned in an open area, away from flammable materials.
-
Use reflective surfaces: Utilize reflective surfaces, such as mirrors or shiny objects, to direct sunlight towards potential rescuers. Position these objects near your fire to increase their visibility.
-
Morse code: Learn basic Morse code or other simple signaling methods. Use your fire as a source of light and darkness to transmit coded messages to potential rescuers, such as SOS or other distress signals.
-
Make noise: Combine the use of fire with audio signals, such as whistles, bells, or even banging objects together. This can help in attracting attention, particularly if potential rescuers are within hearing distance.
By employing these techniques effectively, you can utilize fire as a survival signal and greatly enhance your chances of being noticed and rescued in critical situations.
In conclusion, understanding the importance of fire building in wilderness survival is paramount. From providing warmth and cooking food to creating smoke signals and attracting rescuers, fire plays a vital role in your survival toolkit. By mastering the basic principles, learning essential fire starting techniques, and utilizing advanced methods for different environments, you can enhance your wilderness survival skills and thrive in any situation. Always prioritize fire safety, carry reliable fire starting tools, and be prepared to troubleshoot common fire building problems. With these skills and knowledge, you can confidently navigate the wilds and conquer any challenges that come your way. Stay safe, stay prepared, and let the power of fire guide you to survival.